5. QR CODE Creation
To configure a QR code for device enrollment, follow these steps:
Click on the “QR CODE Configuration” menu. Then, click on the “CREATE QR CODE” button.
Enter a name for the QR code. Optionally, select “Enable System Apps” to enable all pre-installed apps on the device after enrollment. Select the Android profile for which the QR code is being created. Choose the default language and time zone for the device.
Enter Wi-Fi network details such as SSID name, security type, and password. Click on the “SUBMIT” button to generate the QR code needed for device enrollment.
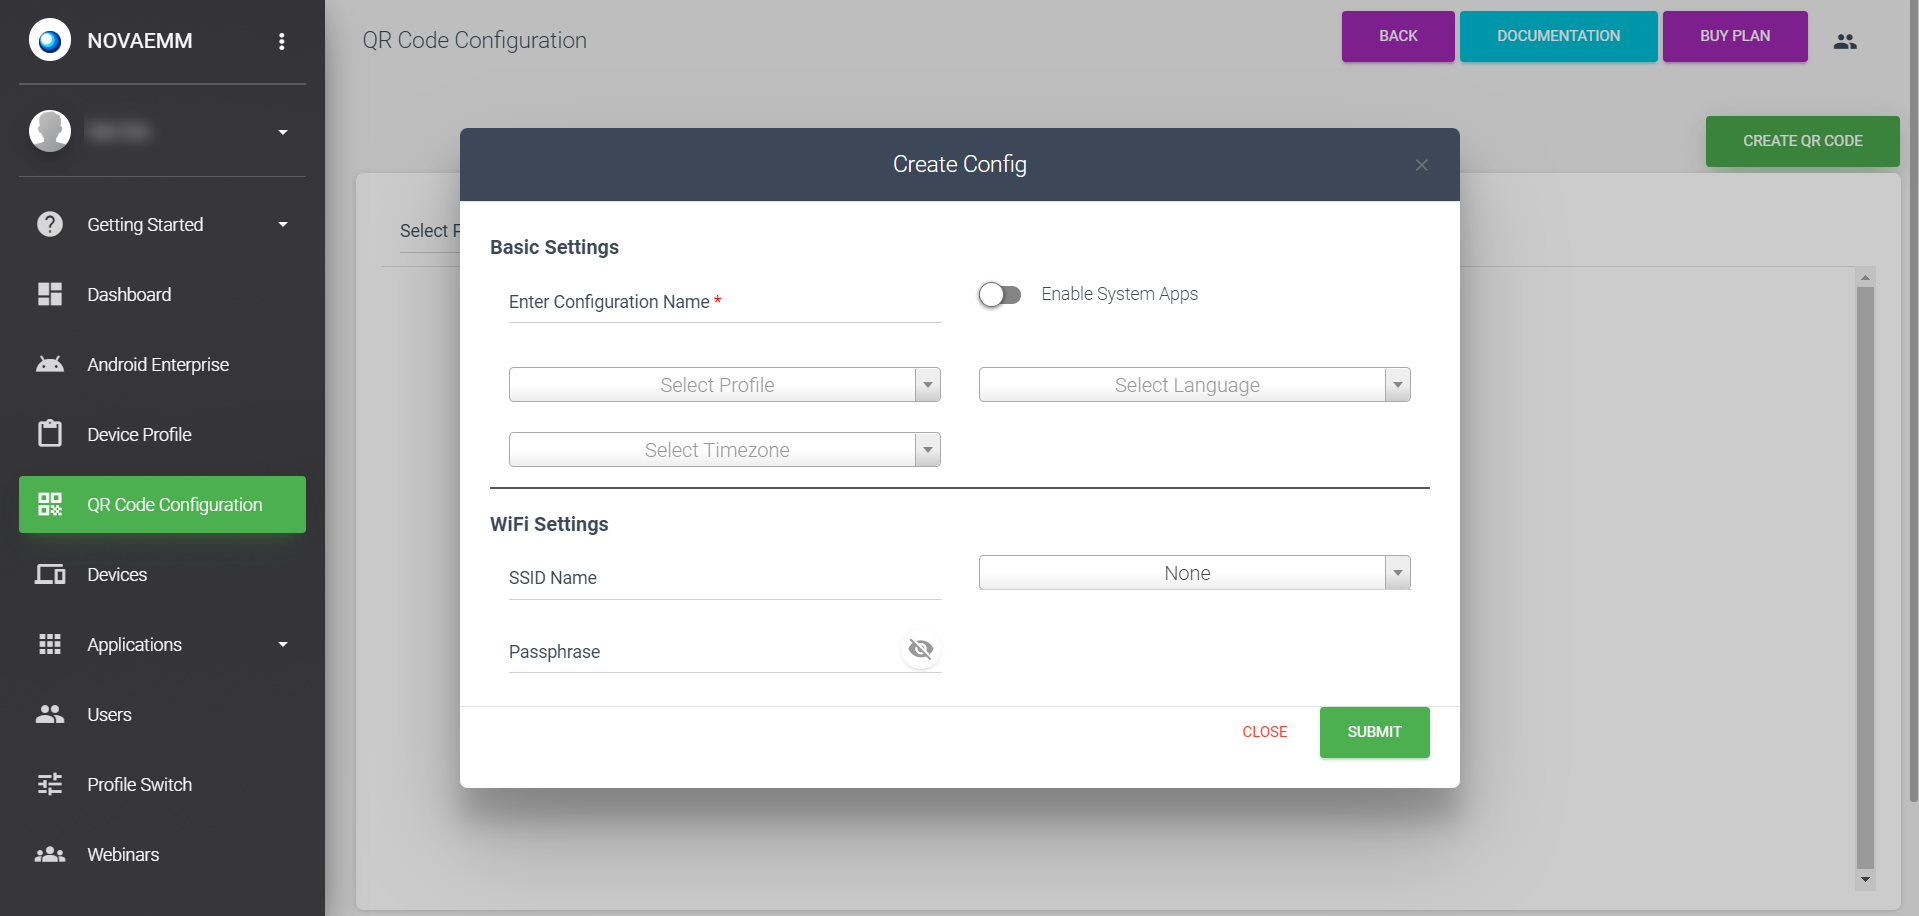
| Basic Settings: | |
|---|---|
| Configuration Name | Enter a meaningful name for the configuration. |
| Enable System Apps | This option enables access to system apps such as camera, gallery, calculator, etc., on the device after enrollment. |
| Select Profile | Choose a Android profile from the drop-down menu. |
| Select Language | Choose the default language for the device from the drop-down menu. |
| Select Timezone | Choose the timezone for the device from the drop-down menu. |
| Wi-Fi Settings: | |
|---|---|
| SSID Name | Enter the SSID name of the Wi-Fi network. |
| Wi-Fi Type | Choose the security type of the Wi-Fi network. |
| Password | Enter the password for the Wi-Fi network. |
Once submitted, a QR code will be generated for device enrollment. Click on the “View QR code” icon under 'Actions' to view and access the QR code.
